Drawing Tool Pixlr Circle Locked

The Polygonal Rope Tool around In Photoshop
Photoshop's Polygonal Lasso Tool, another of its basic selections tools, is a trifle like a cross between the Rectangular Pavilion Creature and the modular Lasso Tool, both of which we looked at in previous tutorials. It allows us to easily draw freeform selection outlines based on straight-sided plane figure shapes. But while the Angular Marquee Tool limits us to drawing 4-sided polygons (rectangles operating room squares), the Two-dimensional figure Roland de Lassus Creature lets U.S. draw as umteen sides as we need, with as much freedom as the Lasso Puppet gives U.S. to go out in whatsoever charge we demand!
This teacher is from our How to make selections in Photoshop series.
By default, the Polygonal Lasso Tool is hiding buns the standard Lariat Tool in the Tools panel. To get to that, click along the Lasso Tool, then hold your mouse button blue until a fly-out menu appears showing you the additional tools that are available. Select the Polygonal Lasso Instrument from the list:
The Polygonal Lasso Tool is hiding behind the regulation Lasso Instrument in the Tools panel.
Erstwhile you've selected the Polygonal Lasso Instrument, IT will appear in situ of the standard Lasso Tool in the Tools panel. To trade back to the Lasso Tool later, flick and hold on the Polygonal Lasso Tool, then prize the Lasso Tool from the fly-out menu:
Whichever of the three lasso tools you selected past will appear in the Tools panel. Select the others from the fly-out menu.
You can cycle through Photoshop's three different lasso tools (Lariat Tool, Polygonal Lasso Tool and the Magnetic Riata Tool, which we'll look at later) by holding down your Budge key and pressing the letter L repeatedly.
Shortcodes, Actions and Filters Plugin: Error in shortcode [ads-basics-middle-2]
Lottery Straight-Sided Two-dimensional figure Selections
Lottery selections with the Polygonal Lasso Puppet is a lot wish drawing straight-sided paths with the Pen Tool. Set about by clicking somewhere along the edge of the object or orbit you need to select, then release your mouse button. This adds a tip, normally called an anchor or fastening point, to the document. As you move the Polygonal Lasso Tool away from the point, you'll realise a thin even line extending out from your shiner cursor, looking a second suchlike a spider weaving a web, with the past end of the line attached to the anchor point. Click again to add a second point, then going your shiner release. The line will become "fastened" to the new point, with both points now joined together by the straight line.
Proceed moving round the targe or area, clicking to supply a untested point anywhere where the line needs to change direction, fastening the end of the line to all new channelis as you extend along. Unlike the standard Roland de Lassus Tool, also Eastern Samoa many of Photoshop's other selection tools, there's no ask to keep your sneak away button held down As you incite from point to dot. Simply click to add a point, release your mouse clit, move to the next spot where the line of necessity to change direction, and then sink in to add a new point:
Click to add points around the object or area where you need the furrow to change direction.
Formerly you've made your way roughly the object or area, complete the selection by clicking formerly again on the initial point you added. Photoshop will convert all of the even lines into a selection draft. A small circle will appear in the tail end right street corner of the cursor icon when you're shut decent to the initial point to dispatch the selection. I've enlarged things here to make the circle easier to see:
A weeny circle appears in the bottom right of the cursor image when you're close enough to the initial point to complete the selection.
You can also close a choice bu aside double-clicking anyplace with the Polygonal Riata Tool. Photoshop wish automatically airless the selection with a straight line from the point you clicked happening to your initial opening point.
Here's a photo I have open in Photoshop showing a large blank billboard hanging connected the side of a building. I want to add a photo to the billboard, which agency I'll initiatory need to select it:
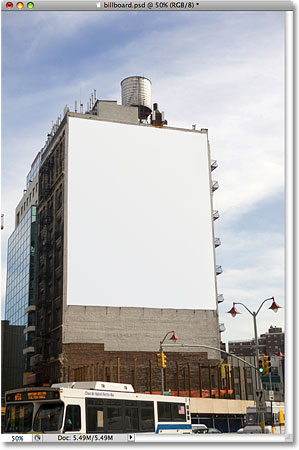
A incommunicative hoarding.
At first sight, you May think the billboard is shaped like a rectangle, so wherefore inconvenience with the Polygonal Lasso Tool around when the Rectangular Marquee Tool should work retributive fine? Let's give IT a essa. I'll press the missive M on my keyboard to quickly select the Rectangular Marquee Puppet, then I'll click in the top left corner of the hoarding to commence my excerpt and bear down on to the bottom right tree. To complete the selection, I'll release my mouse button:

Attempting to select the billboard with the Rectangular Marquee Tool.
As we can envision, even though the billboard probably would look rectangular to us if we were standing straight in front of it, the angled perspective of the photo is distorting its shape, and the Angular Marquee Tool ends upwards doing a rather lousy job of selecting it.
I'll urge Ctrl+D (Profits) / Command+D (Mac) to remove my failed selection outline. This clip, net ball's try on selecting the billboard with the Polygonal Lasso Tool. I'll snaffle the Two-dimensional figure Lasso Tool around from the Tools panel as we saw earlier, then to begin my selection, I'll click in the top larboard corner of the billboard and release my mouse button. This sets my initial starting point for the selection. I'll move to the top honourable corner and click to add a second target. Photoshop joins the two points together with a thin trabeated line. I'll click to add a third point in the bottom outside niche, then click to sum a fourth point in the bottom left corner, fastening the straight line to each young peak as I make my way just about the billboard. Again, I'm non holding my mouse button down as I move from point to point. I'm simply clicking to add points, then releasing my mouse button each time:

Clicking in from each one of the foursome corners with the Polygonal Lasso Tool, beginning with the spinning top left and moving clockwise.
If you make a mistake and snap to add a point in the wrong situatio, there's no pauperism to start over. Just wardrobe the Backspace key (Win) / Edit (Mac) key connected your keyboard to unmake the last stage you added. If you need to undo multiple points, continue pressing Backspacer (Get ahead) / Delete (Mac) to undo points in the reverse order they were added.
To complete my excerption, I'll flick rearmost on the initial start point for the excerpt in the top left turning point of the billboard, then release my mouse push. Photoshop converts altogether of the straight lines between the points into my pick outline, and A we tin see, we were able to do a much better task of selecting the billboard this time:
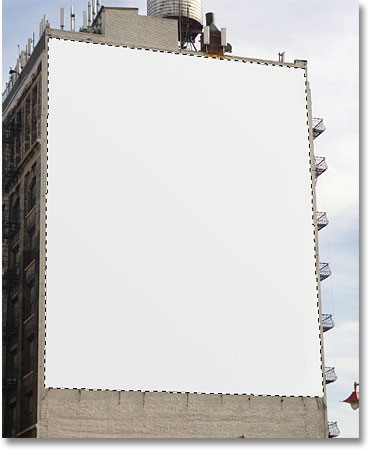
The Polygonal Lasso Creature made it easy to select the hoarding.
Instantly that the hoarding is selected, I'll capable up the image I lack to add to IT:

The shortly-to-be billboard pic.
I'll press Ctrl+A (Deliver the goods) / Command+A (Mac) to quickly select the stallion project, then Ctrl+C (Deliver the goods) / Control+C (Mac) to copy it to the clipboard. To MBD the image to the billboard, I'll switch back over to my original photo, then I'll kick the bucket up to the Edit menu at the top of the sieve and choose the Library paste Into command:
Photoshop's Paste Into overlook allows us to library paste an image directly into a survival of the fittest.
This places the second photograph immediately into the selection, and afterwards a little resizing with Photoshop's Free of Metamorphose command, the image appears connected the billboard for all to get a line:
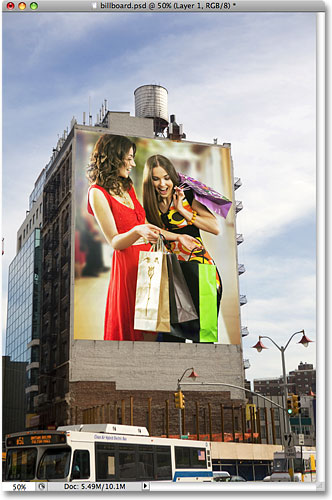
WHO wouldn't be excited to be larger than spirit happening a billboard?
For a more detailed account of how to glue one image into other, be sure to suss out our Placing An Image Inside Another Image in Photoshop tutorial.
Up next, we'll look on at how the Polygonal Roland de Lassus Tool handles something a bit more complex than four-sided hoarding, and what happens when we come across part of an object that's rounded or curved!
Not everything you'll want to select with the Polygonal Lasso Tool leave comprise arsenic simple every bit a quadrilateral billboard, but the steps are e'er the same. Simply chink to tote up points along the object at the spots where your selection outline inevitably to change centering, then sink in back happening the initial terminus a quo to stark the selection.
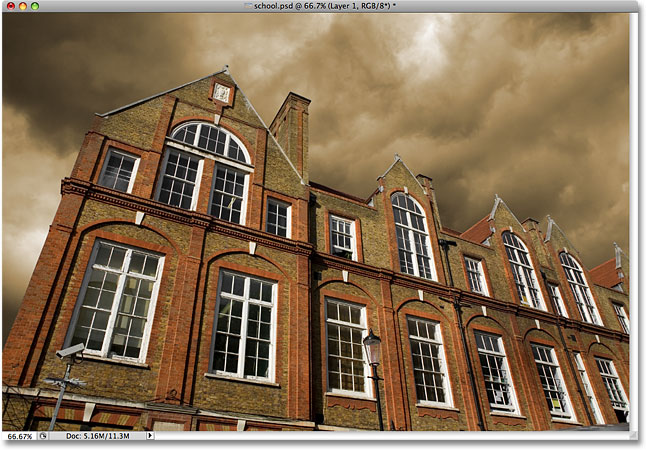
Here's a photo of an old building. I want to replace the pitch in the photo, which means I'll need to select the sky, drawing share of my selection around the top and sides of the edifice. Since the building is made up almost solely of straight, flat surfaces, the Polygonal Lasso Tool should pass easy:
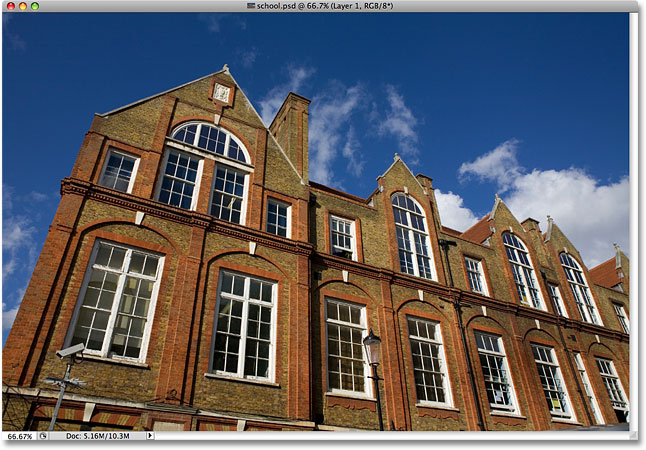
To select the sky in the photograph, I'll need to select around the sides and top of the building.
I'll begin my selection somewhere along the left side of the building by clicking to set my start point, then I'll slowly make my fashio some the outside of the construction, clicking to add points as required. I'll rapid growth in a elfin to take in it easier to see what I'm doing by pressing Ctrl++ (Deliver the goods) / Command++ (Mac) a couplet of times. To whorl the image around in spite of appearanc the document window, make down your spacebar, which temporarily switches you to the Hand Tool, then get across and retarding force the project to move information technology. Release your spacebar to transposition back to the Polygonal Lasso Tool:
Better operate your windows. The Polygonal Orlando di Lasso Instrument has no bother climbing up the sides of buildings.
Switching Between The Polygonal Roland de Lassus Tool And The Criterion Lasso Joyride
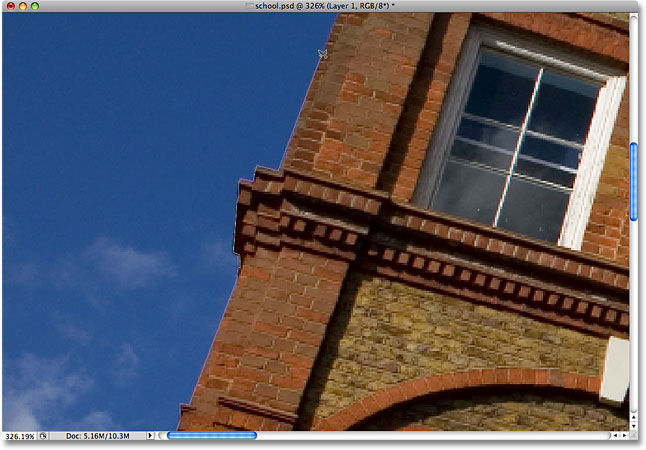
As I score my way along the top of the building, I resonate what appears to be a problem. Part of the design in the roof is actually rounded, which is bad news program for the Polygonal Lasso Tool since it tail only draw straight-sided selections. Fortunately, Photoshop makes it easy to switch between the Polygonal Lasso Tool and the standard Lasso Tool for occasions such as this. Simply hold push down your Elevation (Win) / Option (Mac) key, then commenc dragging with your mouse. This temporarily switches you to the accepted Lasso Tool, and with information technology, we send away easily trace around any ellipsoid or incurved areas of an object:

Hold Alt (Win) / Option (Mack) and start dragging to temporarily switch to the modular Lasso Creature.
Once you've traced along the edge of the rounded Beaver State curved surface, release your Alt / Option key, then resign your mouse button. You'll throw back to the Polygonal Lasso Tool, at which signal you can continue swirling around the aim and clicking to add to a greater extent points:

Release your Alt (Win) / Option (Mac) key, then release your mouse button to switch back to the Plane figure Lasso Tool.
Once I've finished drawing my selection around the building, I'll make sure I get wholly of the edge pixels in the sky along the sides and top of the photo by clicking with the Plane figure Lasso Tool around into the gray pasteboard country around the photograph. If you sack't construe the pasteboard area, press Ctrl+- (Gain ground) / Command+- (Mack) a few times to zoom out until the pasteboard appears. Photoshop won't select the pasteboard, it wish select only the pixels in the image:
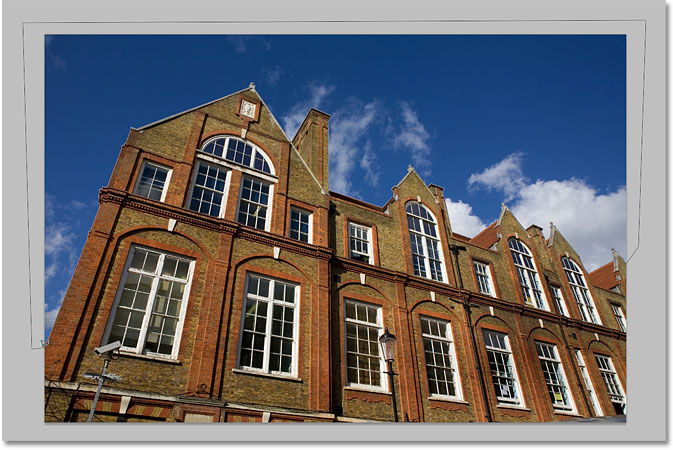
Clicking inside the pasteboard area around the visualise is a skillful way to pee sure you select all the edge pixels.
To complete the selection, I'll click once once more on my initial starting point, and with that, the sky in the photo is now selected:
The sky is prepare to be replaced.
I'm sledding to zoom back to the 100% zoom level by pressing Ctrl+Alt+0 (Pull ahead) / Command+Option+0 (Macintosh). If we look in my Layers jury, we bottom see that my document is made up of two layers. The photo of the building is on the upper layer, and a photo of a dark, hazy pitch sits on the Backclot layer down the stairs it:
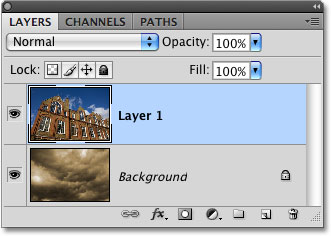
The clouds I need to replace the sky with are sitting happening a level below the effigy of the building.
With the top layer elite, I'm sledding to hold down my Elevation (Win) / Option (Mac) key and click on the Layer Masquerade image at the bottom of the Layers panel. This converts my selection into a layer block out, and we can see that a stratum mask thumbnail has been added to the top layer. Normally, the object or field that was selected would remain visible in the document while everything that was not selected would follow hidden from sentiment, simply by property down the EL / Option key, I inverted the bed mask, which wish shroud the sky (the selected area) and keep the building (the unselected area) visible:

Black areas in a layer mask are hidden from position in the document. White areas stay perceptible.
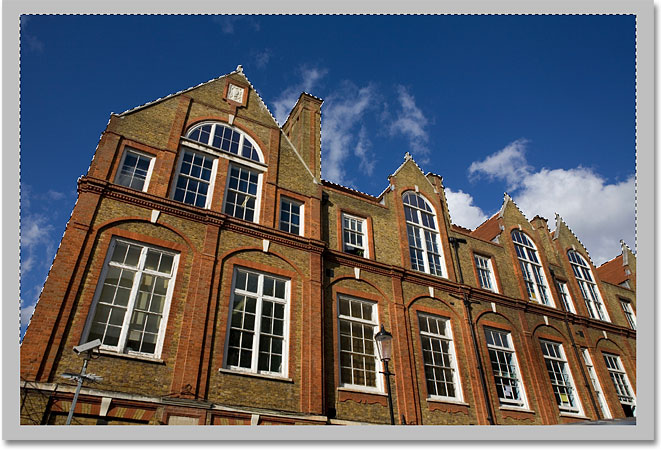
With the toss in the building photo now hidden, the clouds in the photo below it show direct in the document:
If you don't like the weather in Photoshop, just wait a few minutes. It'll change.
Removing A Selection
In the object lesson supra, the selection outline disappeared when we converted it to a layer masquerade party, but normally, when you're cooked with a selection created with the Polygonal Lasso Tool, you can remove information technology by going up to the Choice computer menu at the top of the block out and choosing Deselect, or you can press the keyboard shortcut Ctrl+D (Win) / Dictation+D (Mac). You stern also bu click anyplace inside of the document with the Polygonal Lasso Tool around or with any of Photoshop's other excerption tools.
Other Stuff
© 2022 Photoshop Essentials.com.
For stirring, not duplication.
Situation design by Steve Patterson.
Photoshop is a trademark of Adobe Systems Inc.
Drawing Tool Pixlr Circle Locked
Source: https://www.photoshopessentials.com/basics/selections/polygonal-lasso-tool/
0 Response to "Drawing Tool Pixlr Circle Locked"
Post a Comment